How To Flip Your Classroom In 7 Steps
contributed by Josh Corbat
Students today are vastly different from our own childhoods–and so are their circumstances.
We were brought up on the age-old tradition of lecture, practice, and assessment. Lather, rinse, repeat. Don’t get me wrong, students today were brought up in the same style. But, something is different. Something just isn’t working anymore.
Think about it. When you need to learn how to do something—change your oil, cook eggs benedict—what do you do? You google it! You YouTube it! You may even ask a forum that is knowledgeable on the subject. Why do you do this? Because you know it is the best way to learn in your own style, in your own time.
Self-Directed Learning is the new learning.
Students in the age of mobile devices and Google have been doing this since before they could walk.
What’s The Purpose Of A Flipped Classroom?
The purpose of the flipped classroom is to improve student access to content while reversing traditional roles of learn at school and practice at home to learn at home and practice at school. This allows teachers to support students as they attempt to work with and through the new material introduced at home/through video.
As we said in The Definition Of A Flipped Classroom, “A flipped classroom is a type of blended learning where students are introduced to content at home and practice working through it at school. This is the reverse of the more common practice of introducing new content at school, then assigning homework and projects to be completed by the students independently at home.”
The Flipped Classroom model (or blended learning model, if that is your cup of tea) is based on very simple, logical principles. Students in this age of supersaturation of technology are good at decoding information via media. Videos and pictures are to them what textbooks were to us. In the Flipped Classroom model, short instructive videos are watched at home in lieu of lecture in the classroom. This allows for much more time in the classroom for remediation and differentiation.
Essentially, what would normally be labeled as ‘homework’ is now done in class under the careful eye of the teacher (who can truly be of service, as opposed to being useless to the student struggling with the same assignment at home). Lecture is shifted to homework time, eliminating classroom distractions and the need to tell Johnny a dozen times to sit down and get a pencil out (he doesn’t have one).
My advice to the teacher deciding whether or not to take the leap to the Flipped Classroom is just this: If you decide to go for it, there is no turning back. You need to stick it out. Sure, you can change back at any time (you don’t trade in your lecture card for a video-making card, after all), but I really implore you to stick with it. The benefits far outweigh the outcry you may hear from students and parents. I have seen substantial growth in my students’ abilities since switching. The students have become more independent and motivated learners. They have become more responsible for their work. They have, in short, become more active learners.
If you’ve made it this far, I’m guessing you’re truly interested in giving this a try. I will do my best to lay out the way I flipped my classroom in a manageable, replicable way. I’ll even point out the pitfalls I encountered. Any course can be flipped, as long as it has a direct instruction component. It may be trying at times, and does require quite a bit of prep work, but it saves you time and stress in the long run.
At any rate, here is one approach to flipping your classroom.
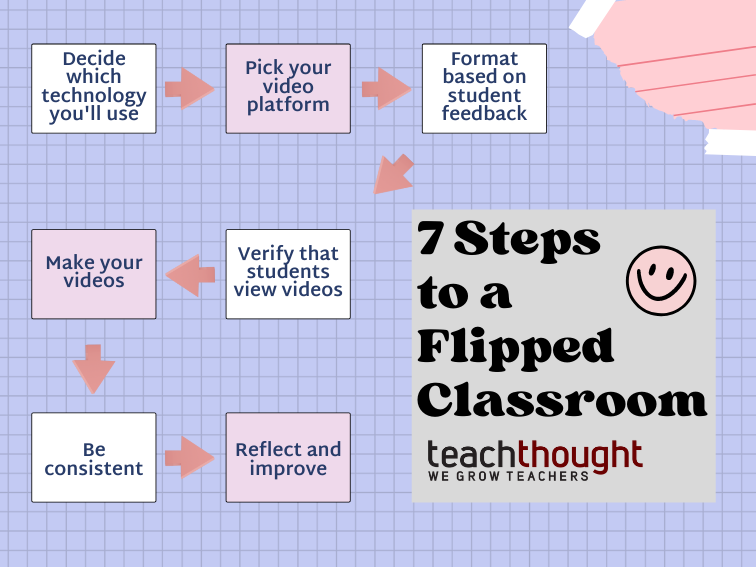
What Are The 7 Steps To Flipping Your Classroom?
While the ‘steps’ are subjective in terms of number, the following is one approach to flipping your classroom.
Step 1: Decide which technology you will use
Low tech or high tech? That is, indeed, the question here. You really need to choose something that is easy and straightforward for you. After all, if it isn’t easy for you, this whole process can be grueling.
The videos themselves are not meant to be worthy of the silver screen. They are meant to teach your content, not show off your editing skills. The key thing here is to make them in one take. If you slip up a little, no big deal. It should take you 5 minutes to make a 5-minute video.
There are so many ways you can flip your lectures. The low tech, less time consuming approach is to simply use your phone or laptop camera (if it has one). Then you just upload your video to Vimeo, YouTube, or other video hosting platform–preferably your own channel so you can control the privacy.
The slightly higher-tech approach would be to use an application like Loom to capture your voice and screen. I take this latter approach, having my face on the screen for the first and last 10 seconds as an introduction and wrap-up. After the introduction, I just narrate my existing PowerPoints. No need to create anything new. You are, after all, simply filming your existing lectures.
To get a better idea of what these videos might look like, just search for flipped classroom on YouTube. You should find countless examples.
Step 2: Pick your video platform
In lieu of having mentioned alternatives to YouTube like Vimeo, I obviously recommend YouTube, because it is the easiest service to work with. You can certainly choose anything out there, though, especially if your district blocks YouTube. The main things to consider are:
What allows me to control the data and privacy of my content and that of my students?
What service will be easiest for my students to access at home?
Do I want my videos to be public or private? (YouTube has this option, and still makes it very simple to share your videos.)
My main reason for choosing YouTube is that it is available everywhere, on every device. My students have literally no excuse for not watching my videos. They can’t claim technological difficulties. They can’t claim they didn’t have time, because they can now watch my videos on their iPhones on the bus. Those annoying cell phones are now our weapons against students that try to make excuses.
Step 3: Decide on a format–and listen to feedback from students
Should they be pure lecture? Should they start with a reflection or ‘pre-assessment’ where you have the students pause the video and respond to a prompt of some kind? Should you include any other video content besides you talking? How about a PowerPoint? Or a mix of the above?
Start simple with a repeatable format and grow from there based on feedback from your students as to what’s working and what’s not
Step 4: Make your videos!
When it is time to make your videos, set some limits. These limits will not only help you while making them, but will help your students while they watch.
The limits I decided on were a maximum video length of five minutes, and no more than three videos assigned per night. This way, students are not overloaded on any given night and can even watch the videos in the morning before school in case they forgot or do not access to technology at home. If you’re wondering how your lectures will fit into 15 minutes a day, keep in mind that you no longer have to deal with classroom distractions, like backing up for the slow writer or dealing with behavior issues. The slow writer can hit the pause button. My 40-minute lectures are not about 10 minutes long. Seems impossible, but you will see!
While filming, add your flair. Be yourself. Be funny. Be at ease as though you were talking to them in-person, in the classroom. This is a good way to keep your students’ interest and show them that you are still their teacher, even though you’re in cyberspace.
Tip: Start out with two or three videos and build over time. You’re likely to improve the content dramatically over time and if you record everything in a short amount of time, you’ll lose the ability to improve them without redoing them completely.
Step 5: Create method to verify students view videos
One of the main questions I get when presenting about the Flipped Classroom is how I know my students are watching my videos.
It is very important to hold your students accountable for watching them every evening. There are a few ways to do this, of course, so you need to find the one you’re most comfortable with. I have them fill in skeleton notes. Notes quizzes would also be an effective way to check that they did the notes and understood them. I’ve even heard of teachers hiding a picture, word, or phrase in their videos and asking about it the next day. None of these methods are foolproof, of course, but it at least covers you in the event a parent or administrator asks how you know a student is doing what is asked of them.
It puts the responsibility on the student. Because my students are responsible for watching and understanding the videos, they are becoming much more independent learners, which is of vital importance in today’s ever changing world. Like I said earlier, this method has some huge, hidden benefits.
Step 6: Be consistent
Find a video-making schedule that fits your lifestyle. Some of my colleagues have locked themselves in their classrooms for an entire day and knocked out all their videos. I preferred to do my videos at home on Sundays.
Sure, it wasn’t always the most interesting thing to do on a day off, but I found it to be surprisingly relaxing. However you fit making your videos into your already busy life, just keep in mind that you are doing good work. Also keep in mind that you get to reuse your videos in the future! You’re saving yourself so much time in the long run.
Step 7: Reflect and improve
The big picture of a flipped classroom is similar to anything else you do as a teacher: you try new ideas, throw out what doesn’t work, keep what does, and continue to build your tools and strategies over time
Once you have your video-making schedule underway you can start to reflect on how much less stress you have. Now, whenever a student is absent they can still view your lecture online. Special education teachers and administrators will love you because they can now access your teaching directly. Parents now have no delusion that you don’t know the material or that their child lacks access to content or activities You are available on demand. Anytime. Anywhere. A bit creepy? Sure. But, it’s worth it the first time you hear that a student has used your videos to master the material.
The Flipped Classroom model drastically changes the way you teach. If you are a teacher that likes to keep up with current advancements in education, and reap their vast rewards, the model is a great thing to try. At the very least your students will have more access to the material. They will also have more access to you, which is the biggest benefit of the Flipped Classroom.
After all, you are their most important resource. Never forget that.